Lime rendering is an ancient wall covering technique that is seeing a renaissance. This technique uses a mixture of lime, sand, and water to produce a breathable, long-lasting, and aesthetic finish. In this article, we discuss lime rendering, including its definition and application process.
What is Lime Rendering?
Lime rendering is a type of covering for walls that is made from lime. It is breathable, unlike a cement render, so it allows walls to breathe, making moisture build-up difficult and stopping dampness. Being a porous material, lime helps moisture to evaporate, thus contributing to a better indoor climate.
Benefits of Lime Rendering
- Breathability: Lime enables walls to breathe and prevents moisture problems.
- Flexibility: It can endure a little movement of the structure without fracturing.
- Sustainability: It is an eco-friendly material with minimum carbon composition as compared to cement.
- Aesthetic: Gives a subtle, natural appearance that ages favorably.
Lime Render Mix
Any successful rendering project starts with the right lime render mix. The fundamental elements are lime, aggregate (most often sand), and water. The actual mix design (proportion of lime and the type of lime) will depend on the application and finish desired.
Types of Lime
- Non-Hydraulic Lime (NHL): This lime sets slowly by absorbing carbon dioxide from the air in a process called carbonation. It is more translucent and elastic.
- Hydraulic Lime (HL): This lime hardens by reaction with water and therefore can be used in wetter situations. It is cured faster and harder than NHL.
Lime Render Mix Ratio
There is no perfect lime render mix ratio, but a typical starting point is 1 part lime to 3 parts sand. Typically, a rougher sand is used for the base coat, and finer sand is typically used for the top coat. Mix adjustments should be based on site conditions; always follow the manufacturer's recommendation.
How to Mix Lime Render
Mixing lime render properly impacts the appearance and durability of the job.
- Gather the Materials: You will need lime, sand, and clean water.
- Dry Mix: Dry mix lime and sand (in a bag or container or alternating in a mixer). Keep them within range of each other.
- Add Water Slowly: Add water as you mix until the dough holds together and can be handled. The consistency should resemble that of a plastic and sticky mass, not too wet and not too dry.
- Let it Slake: Let the mix sit for a minimum of 30 minutes to allow for proper slaking (water absorption of the lime).
- Re-mix: Re-mix before use, adding additional water as applicable to achieve proper consistency.
How to Apply Lime Render
Applying lime render is a skilled process that requires patience. A durable finish requires proper prep and application.
Surface Preparation
- Prepare the Surface: Make sure to clean the wall of any dirt, loose material, and old paint.
- Wet the Wall: Lightly wet the wall to allow for a proper bond of the render. Avoid soaking the wall.
- Scratch Coat: A thin scratch coat of lime render is the first coat applied. It serves as a key for the following coats. When it is still wet, scratch the surface creating a texture.
Applying the Render
- Use it in stages: When applying this render, use it in thin layers (approximately 6-10mm thick) to avoid cracking. Let it dry between every layer you put on.
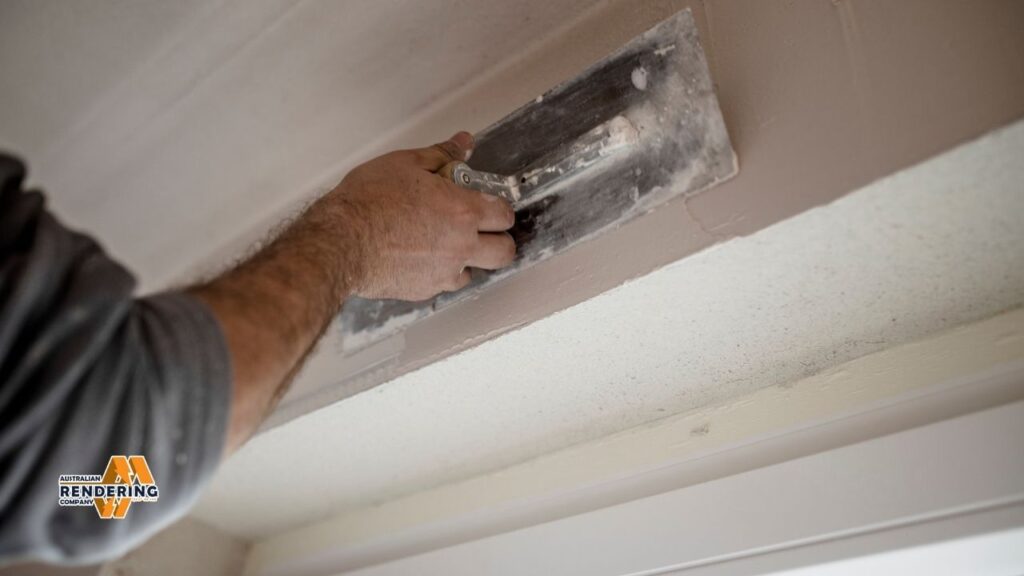
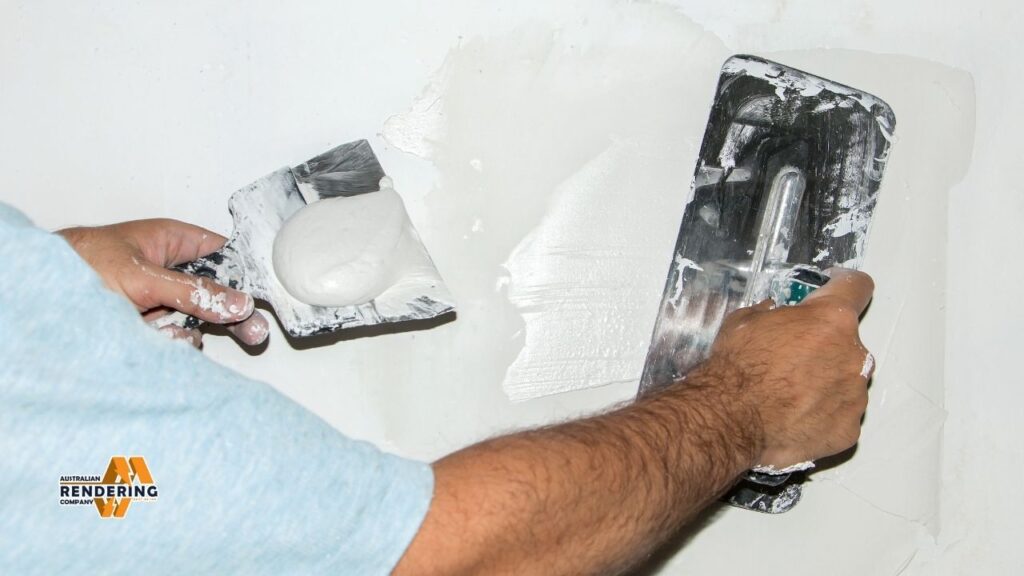
- Hawk and trowel: Carry the render on a hawk and apply to the wall with the trowel.
- Thickness consistency: Look for a uniform thickness across the whole surface.
Finishing the Render
- Floating the Surface: When the final coat is just starting to cure, you can smooth it out with a wood or plastic float.
- Prevent Drying Too Fast: Use wet hessian or plastic sheeting over the render to protect it from drying too quickly. This helps reduce cracking.
Cement Rendered Surface with Lime Rendering
One of the most common questions asked is whether you can lime render over cement render? The short answer is, well, there is no short answer. Cement render has no breathability that would cause moisture to be trapped behind the lime render - a problem! Note: Preparing how to lime render over cement render takes time and some damage may not be preventable.
Preparing Cement Render
- Inspect the Cement Render: Look for cracks, hollows, or damage. Pack these out before lime rendering.
- Achieve a Key: Score the top surface of the cement render to create a key for the lime render to grab onto. This can be achieved by hacking or scoring the surface.
- Use Bonding Agent: Use a bonding agent which is used for applying lime over non-porous surfaces.
NOTE: Lime render over cement render, while preferable to a non-breathable surface, will not have the same lifespan/endurance as lime render on the correct substrate. Australian Rendering Company has been in the game for around 30 years, rendering Melbourne homes from acrylic, cement, or cladding; we can tell you the best way forward in your individual situation.
How to Lime Render a Wall
In short, here is how to lime render a wall:
- Essentially, the first step is to clean and moisten the surface.
- Spread a scratch coat and allow it to dry.
- Allow subsequent coats to dry; repeat 2-3 thin layers.
- Use a float to smooth the final layer.
- Keep the render from drying too quickly.
How to Lime Render a House
How to lime render a house is basically the same as how to render a wall, but on a bigger scale. Pay special attention to:
- Sound Design: Maintain the mix and have the mix be the same throughout the project.
- Environmental Factors: Prevent rendering in extreme climates or bright sunshine.
- Scaffolding: Use proper scaffolding to reach all sections of the house safely.
How to Colour Lime Render
Answer: Natural pigments can be used to colour lime render. They are mixed with the lime render before application to get the desired colour. They are mostly mineral pigments that are lightfast and lime binding.
Adding Pigments
- Pigments: Use pigments that are intended for use with lime.
- Combine with Water: Add the pigment to a few drops of water in a glass to turn it into a slurry.
- Mix In: Add the pigment slurry and mix well until the pigment is thoroughly combined in the lime render.
How to Paint Lime Render
The process of how to paint lime render is not the same as painting a normal wall. If you need to paint, choose breathable paint appropriate for lime render only. These paints are breathable, so they do not hold moisture in the render. Acrylic or vinyl paints tend to trap moisture and ruin the render.
Breathable Paints
- Limewash: Traditional paint made from lime and combined with water. Features a chalky, natural finish, whilst also being highly breathable.
- Mineral paints: These paints are made of natural minerals. They are also breathable, sturdy, and eco-friendly.
Applying Paint
- Surface Preparation: Ensure that the lime render surface is clean and dry prior to painting.
- Use Multiple Light Coats: Apply multiple light coats instead of one heavy coat.
- Let Dry: Ensure that each coat is dry before moving onto the next.
How to Use Lime Render
The application of lime render is not limited to just walls; it can be used for many different things.
- Internal Walls: Ensures a breathable interior and healthy indoor air quality.
- External Walls: Offers a weather-resistant finish that is durable and beautiful.
- Feature Walls: A perfect way of introducing texture and character to interior spaces.
Lime Render Cost
Lime render pricing varies depending on the size of the area, the type of lime, and the complexity of the job. Due to the specialist nature of the skills and materials required, it is generally more expensive than cement rendering.
Factors Affecting Cost
- Lime and sand: The type of these two key components has a bearing role on price.
- Workforce requirements: Jobs require skills, thus work is expensive.
- Surface Preparation: Surface preparation is often complex and can contribute heavily to the total cost.
Need to Know: Drying Times for Lime Render
It takes a few weeks, months, or even over a year to dry completely, but it will harden in the beginning in a few days depending on environmental conditions (temperature and humidity) and type of lime used. NHLs are quicker setting than non-hydraulic lime. As a rule of thumb, you should allow a few days between each application for each coat to dry. The more precise issue of how much time lime production takes to dry can only be responded to with local conditions of the area being worked with. Some jobs can take weeks to fully cure later.
Drying Times
- Scratch coat: Minimum 2-3 days.
- Additional Coats: Wait 3-7 days between additional coats.
- Final Cure: The render will take a few weeks to continue hardening.
Is Lime Render Waterproof?
So, no, it is not waterproof, but it is water-resistant and breathable. That means it allows the moisture to escape without a build-up. If the conditions are very wet, a shelter may be required to prevent the render being adversely affected.
Water Resistance
- Breathability: It permits moisture to escape.
- Capillary action: Pulls the moisture up from the substrate.
- Natural Defensive: It creates a barrier against the rain and dampness.
Is it possible to apply lime render over brick that is already there?
Yes, lime render can be placed directly over brickwork. Keep the brickwork clean, solid, and without loose material. Wet the bricks before applying, which can help them adhere to each other.
How often do you have to reapply lime render?
Lime render will last for many years if applied correctly and maintained. Depending on the exposure and wear on the render, reapplication may be in order every 20-30 years, or longer.
When do you know if lime render needs repairing?
Indications are cracking, crumbling, or hollow areas. Fixing these issues on the spot can save further damage.
Does lime rendering need special maintenance?
Lime render should be inspected and cleaned on a regular basis. Do not use any harsh chemicals or pressure washers, as this can damage the surface.
In cold climates, can it be regular lime or should it be MPC?
Yes, but some precautions must be taken to avoid frost damage. Keep the render safe from freezing on the first few days of curing. Hydraulic lime could be helpful in cold climates.
Why use lime render over cement render?
Lime render is breathable, flexible, and sustainable. It also has a softer, more natural look than a cement render. Compared to lime render, cement render is cheaper, dries faster, and is stronger.