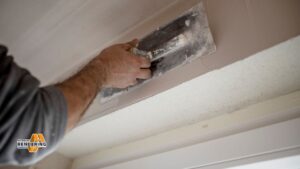
Rendering is the process of evenly spreading a premixed layer of sand and cement, or sometimes acrylic and silicone render like modern products onto the external walls and sometimes internal walls too. This finish can be polyant (smooth) or textured and is used to protect the brick or block work from the elements in addition to improving the buildings thermal performance and aesthetics. There are different kinds of render, including traditional cement render, lime render (common in historic houses because of its breathable nature), acrylic render (popular due to its flexibility and availability of colours) and silicone render (which is valued for its water repellent nature and long life). Cleaning and maintenance of such rendered walls entail careful strategy and thought process to maintain the beauty and life of the walls. In this article we’ll be looking at how to clean rendered walls, how often you should clean them and the maintenance needed to nursing them back to health from covers tackling the removal of different types of layer such as algae, general grime, the best cleaning solutions, how to preventing buildup and more.
How Can You Keep Rendered Walls Clean and Well-Maintained?
To keep render clean, washed render should be inspected regularly, cleaned using an appropriate cleaning technique for the render and the type of soiling that is present, and damaged areas repaired as quickly as possible to maintain the render’s overall appearance. The main objectives are to: remove dirt, stains, organisms such as algae, moss, fungi, and excrement; protect the render from decay to provide an extended service life and an attractive appearance; and potentially provide the client with extra value by giving 10-15 years of protection with subsequent extending through repeat treatments.
What Are the Different Types of Render and What Makes Them Unique?
There are a number of different types of render and knowing which type you have will help you identify what remedial cleaning and maintaining is required. Types of render come in several different forms, each with its own set of properties:
- Cement Render: This is a standard mix, made up of sand with cement occasionally with the addition of lime. It’s a tough finish, but can crack if incorrectly applied or if there is a severe amount of building movement. It is also generally more porous, if not painted or sealed.
- Lime Render: Constructed from sand and lime, lime render is more breathable and flexible than cement render. It is frequently stated as ideal for older, more historic buildings as it also allows moisture to ‘breathe’ through the tight wall structure, thereby not encouraging damp problems. Lime render is a softer material than cement render and can be cleaned more delicately.
- Acrylic Render: This type has acrylic additives in the mix, which gives flexibility, water resistance as well as often, pre-mixed colour. Acrylic renders are known for having less problems with cracking compared to normal cement renders and they can provide a wide range of textures or a smoother finish.
- Silicone Render: Silicone renders are extremely hydrophobic (water repellent) and breathable and self-clean to an extent because rainwater can wash away dirt. They have great anti-algae properties and last long. This variety is usually a little pricier.
- Polymer Render: This type covers the range from a light acrylic based render through to full silicone, and concentrate on adding a polymer to the cement combination to improved qualities such as adhesion, flexibility and water resistance.
- Monocouche Render: Based on a French word meaning ‘single coat’, this is a decorative, through-coloured render which is applied in one coat. It is usually a polymer modified cement with pigments. Designed to be weather-resistant and low-maintenance.
It is of vital importance to know which type of render was used as the cleaning that is selected, particularly that using pressure and chemicals, will need to be adapted so we do not cause damage.
What Are the Initial Steps Before Cleaning Rendered Walls?
Some steps will be required before you start cleaning your exterior rendered walls in order to maximise safety and effectiveness:
- Inspection: Ensure the rendered surface is free of cracks, loose material or defect. If you pressure wash you may make things worse. You should try and have anything repaired prior to deep cleaning. First of all, consider what the grime is – is it general dirt, algae or moss, or is it general stains?
- Find Out the Render Type: Finding the type of render used (cement, acrylic, lime or silicone based) is crucial, as we’ve already mentioned. If you’re not sure, check your building plans or consult a professional. This will determine how soft your cleaning process needs to be, and what kinds of cleaning products are actually safe to use.
- Test Clean: Always test clean a small hidden area first. This is useful to test if the method and cleaning solution selected is working or causing any discolouration or damage to the render finish.
- Protect Bordering Surfaces: Protect plants, flower beds, window frames, doors, and any sensitive surfaces in the vicinity with plastic sheets or tarpaulins to prevent the spread of cleaning solutions and material that is dislodged.
- Collect the Gear: Get together all the equipment. This may include:
- Brooms or brushes with soft bristles
- Buckets
- Garden hose, adjustable spray nozzle
- If the render type allows, pressure washer working on a low-pressure setting
- Suitable cleaning agents (mild detergent, render cleaner or biocide for organic matter)
- Ladders or Scaffolding for access (as long as they can be safely used)
- Personal Protective Equipment (PPE): gloves, safety goggles, and possibly a mask -particularly when dealing with chemical cleaners.
- Select the Right Weather: Selecting a warm, cloudy day is ideal. Cleaning in full hot sun could cause cleaners to dry too fast, leaving streaks or prevent the cleaners from being effective. Stay out on extremely windy days as the application becomes challenging and the pesticide will drift. Rainy days are also no good.
- Clear Away Surface Debris: Sweep away the dirt, cobwebs, leaves, or anything else that you can pick off with a soft brush or broom to ensure that the water or cleaning solution you use can actually reach the surface. This will help prevent cutting pumice or abrasive material into the render when during keying.
By following these simple precautions the cleaning can now be performed in a more safe and efficient manner and with less possibility of causing damage to rendered walls and adjacent property.
What Are the Main Methods for Cleaning Rendered Walls?
There are 3 main ways to clean render walls and they cater for varying types of render and different levels of dirt. They include hand scrubbing, low-pressure washing (also known as soft washing when it entails a cleaning solution) and regulated pressure washing.
How Does Manual Cleaning (Hand Scrubbing) Work?
This is the least aggressive way of cleaning it and is good for all render types but especially softer renders such as lime render or when the culprit is a small, localised patch of dirt.
Method: With one of the methods being a bucket of soapy washing up liquid and a brush, scrubbing it with a brush or sponge. Once the wall is cleaned with a slight scrub, the dirt will lift. The bubbles keep forming while the wall is being combed and the dirt will keep lifting. A bit of elbow grease might be needed for those tougher ones, but don’t go in too heavy with the abrasive scrubbing. Rinse the wall completely with clear water from a garden hose, from top to bottom, after scrubbing.
Pros: Good for high precision work. Less risk of causing damage to the render. Is designed for targeted cleaning.
Cons: Time consuming and hard work for larger areas. Not suitable for severe soiling and large quantities of organic growth.
What Is Soft Washing and When Is It Used?
The most appropriate technique for all of today’s renders (modern renders such as acrylic, silicone and monocouche) is soft washing because it can tackle grime without causing any damage. More than being high pressure, it depends on the cleaning solution.
Process: It is typically done with a low-pressure water source (like a garden hose and spray nozzle or set pressure washer at its lowest setting – a low-pressure setting is at or below 500 PSI) and a cleaning agent. For normal dirt, a light detergent is recommended. Specialist biocide or fungicidal wash is used for organic growth such as algae, mould or moss. A cleaning solution is usually sprayed on to the render, and is allowed to dwell for a set time (specified in the product guidelines) which helps loosen the dirt. Following this dwell time, the area is rinsed well with low pressure wash water. Gentle brushing of particularly affected areas can sometimes be added to the application of the chemical before a rinse.
Pros: Good for dirt, grime, and biological growth. Mild on the render surface, therefore less likely to cause damage than high-pressure washing. Compounds the spores of organic growth, preventing fast reoccurrence.
Cons: You’ll need suitable cleaning chemicals, which you’ll need to select appropriately depending on the type of render and the type of soiling. PPE is necessary when dealing with chemicals.
When Is Controlled Pressure Washing Appropriate?
This process can also be applied to some stronger renders (eg sound cement render), but proceed with extreme caution. In most cases, never for painted renders, old renders or soft renders such as lime, acrylic or silicone – unless carefully undertaken by a skilled professional working at extremely low pressures.
Process: The render surface is sprayed with water at a specific pressure setting to remove dirt, grime. Be sure to use a fan-tip rather than a jet nozzle to spread out the pressure and keep the nozzle moving. The pressure shall be as low as possible (e.g., 80-120 PSI as a very general rule of thumb, but always verify first). Distance the nozzle to the wall (e.g. 200 mm) must be maintained. Work from top to bottom. High pressure rinsing sometimes follows a soft wash, and is used to rinse surfaces treated with a softer wash chemical.
Pros: May be faster on large areas of strong render if done properly. Effective for rinsing.
Cons: Risk of damaging the render if the pressure is too high, the wrong nozzle used, or used with an unsuitable render type. Can blow water into a crack, give a “stripped” look or even strip away the render. You may not kill biota spores, resulting in a faster return in growth if a biocide is not used. It is not advisable to pressure wash dry-dash finishes.
Steam cleaning is an alternative method occasionally employed by other pros; steam cleaning works using high-temperature steam at lower pressure. This can be a great way to kill off the organic growth and remove grime, but suitability will once again depend on the type of render.
Either way, test in an inconspicuous place first. If the matter is extensive, or difficult, or if you’re not sure what to do, using a professional render cleaning service is often less risky and more efficient.
How Can You Get Stains and Growth Off Rendered Walls?
Stucco walls can become dirty or stained with several different kinds of stains and biological growths. How you clean off moldy rendered walls will depend on what exactly these stains and spots are.
How Can General Dirt and Grime Be Removed?
These are the average airborne particles and pollutants that land on walls over time.
Removal: It is usually enough just to clean them with a mild soapy water that is only lukewarm: Use a soft brush and rinse them under the tap. Low-pressure washing or soft washing with mild detergent may also be useful for the cleaning of rendered walls containing this soiling.
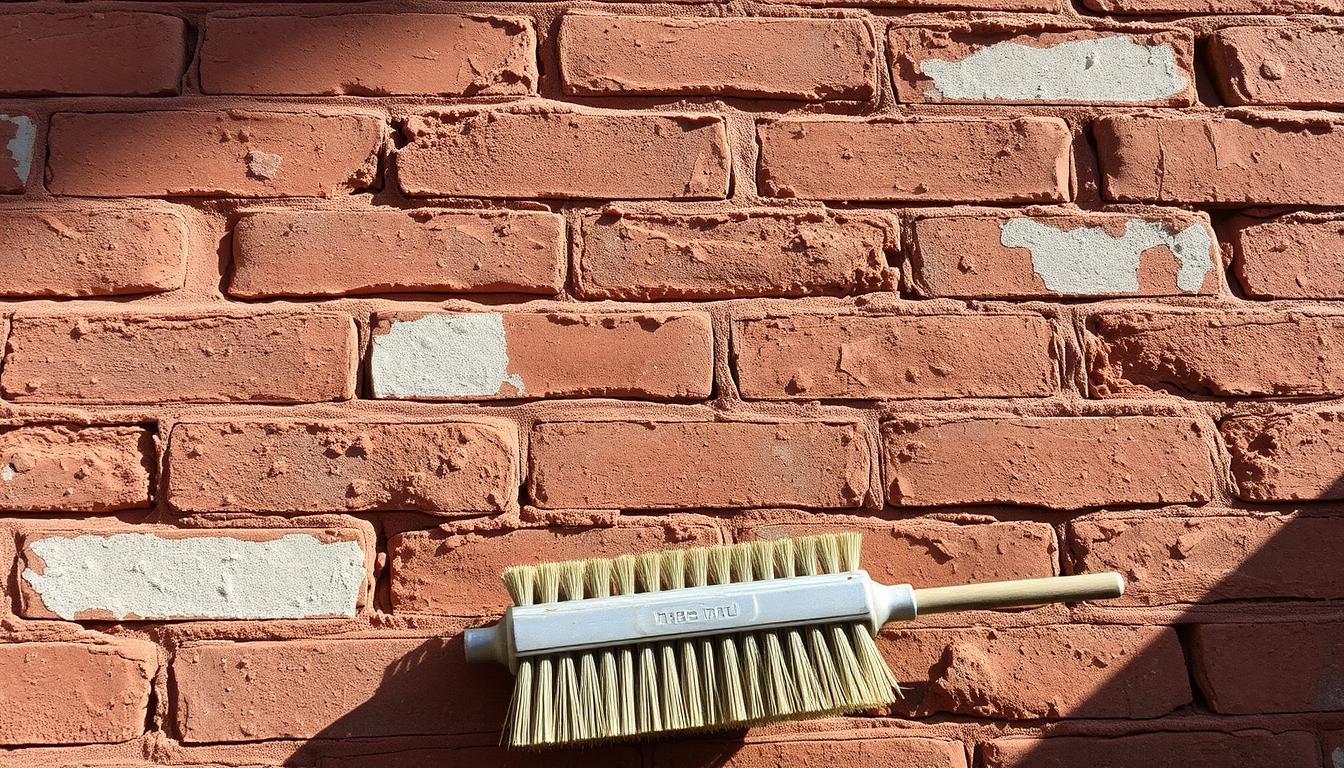
How Is Algae (Green, Red, or Black) Removed?
Algae take the form of dark, filmy coats and are prevalent in moist, shaded locations.
Removal: The best way to remove and clean algae from rendered walls is to treat it with a good quality algaecide. This (usually with low-pressure sprayer, soft wash) is sprayed on the house, is allowed to sit for 5-10 minutes to kill algae, then rinsed. Scrubbing by hand after application might do the trick for a few persistently stubborn areas. If you want to pressure-wash it, fine, but it will only take off the algae, NOT the spores, and it will come right back in no time at all.
How Is Moss Removed?
Moss is green, lumpy clumps that favors ongoing wet conditions.
Removal: The first thing to do is remove all the bulk moss growth you can when it’s dry with a gentle scraping or brushing (to not smear). Then spray the area with a moss killer or strong biocide solution according to the product’s instructions. This should kill what’s left of the moss and its root-like structures (rhizoids). Once the moss has perished (it’s likely to change colour), it can be brushed away, or washed off with a low-pressure wash.
How Are Mould and Mildew Tackled?
These are varieties of mold that present as dark, gray, and white patches, typically in poorly ventilated moist environments.
Removal: A fungal wash or bleach based solution (eg a weak solution of bleach – generally 1 part bleach to 3 or 4 parts water, but always test first and check render compatibility, in particular coloured renders) can be used. Rub on, leave to stand, lightly scrub if necessary, rinse well. There are also commercial special mould and mildew removers. Make sure the area is well-ventilated if using a bleach-based solution. And a fungicidal rinse will help protect against re-growth.
How Is Lichen (Referred to as Dry Mold by User) Removed?
Lichens are a combination of an algae and a fungi, and are generally hard, crusty and range in color.
Removal: Lichens may prove more stubborn. Applying wet compresses to the area before post-dye can give you some relief. Typically, a lichens fungicide is required. Application might have to be repeated. The dead and separated lichen can be removed by scraping or brushing and rinsing. If there’s a lot of lichen it may need a little more heavy duty approach, like rapid moss and algae killer that you leave in for 30-60 minutes and then hose off.
How Are Rust Stains Treated?
Metallic contamination — usually from rusting metal work (such as satellite dish brackets), railings, leaking gutters or downpipes.
Removal: You can find commercial rust remover. Solutions based on oxalic acid may work, but you should use them very carefully, read and follow the instructions, and try the cleaner out on an inconspicuous spot beforehand to see if it will etch or discolour the surface. It is important to address the cause of the rust so it does not happen again.
How Is Efflorescence Handled?
These are soluble salts that are moving out of the masonry/ render and are congregating on the surface as the moisture evaporates.
Removal: Efflorescence can generally be removed by a stiff (but not wire) dry brush. Want some more? Rinse with fresh clean water. Do not use too much water, as this can dissolve more salts and bring them to the surface. Specialist efflorescence cleaners are also available, but they should be used with care. Better drainage and any moisture problem that is a cause need to be rectified to keep it away.
Wear personal protection equipment, such as gloves and eye protection, when cleaning rendered walls or using any chemical cleaners. Before use, test products on a hidden, small patch to make sure they don’t damage or discolour the render. For problems that are frequent or severe, at least consulting a professional is advised. The work will be easier and the render look better too if it’s kept clean and you’re on top of growth as it arrives.
How Regularly Should You Wash Your Render?
The frequency at which coated walls should be cleaned depends on various factors –such as the nature of the coating, the local environment, how exposed the building is and the desired appearance of the coating. But as a general rule render does need to be maintained occasionally to keep up it’s appearance as is the case with all render systems.
For general maintenance, most advice is that a little cleaning every 6 to 12 months is a good idea. Some sources recommend a good wash down once a year, or as needed to keep it looking the way you want it to. If the property is situated in an especially high pollution location, close to the coast (salt spray), surrounded by lots of trees (higher volume of organic growth) or in an area that is particularly damp or humid, then cleaning may need to be carried out more frequently, possibly every six months. For example, polymer render ought to be washed a minimum of once per year. Routine visual inspections every few months can help identity if cleaning is necessary before it can be visually spotted only by a few people.
For given types of render and conditions:
- Newly Painted Walls: Within the first few years, these typically need to be cleaned less frequently, unless you hang out in particularly smokey or humid areas.
- Light-Colours Renders: Dirt & algae may be more visible and need more light cleaning than for darker render to keep them looking clean depending on the environment and level of exposure.
- Algae/Moss Prone Areas: Walls that face North or are shaded by trees/buildings are more likely to be affected by biological growths… you may need to focus on these areas more frequently. If you take care of any algae growth as soon as you notice it, you can prevent staining from occurring.
- Preventative Clean: Even if you don’t have visible growth, give the render an occasional wash with say Weber CL150 (a broad-spectrum biocide) to knock off emerging bacterial, fungal and algal species, so they build up slower and don’t show so soon keeping the render looking fresh.
The real answer to the question “How often to clean render?” is when it looks like it wants it, combined with a proactive regime of at least an annual light clean or inspection. It is better to clean gently and often, than infrequently and aggressively, which is more likely to cause damage. Regular preventive cleaning—such as keeping gutters free of leaves and cutting back overhanging branches—can also help reduce the amount of cleaning needed.
What Preventative Maintenance Is Recommended for Rendered Walls?
Regular and preventive maintenance is crucial to caring for, extending the life and appearance of rendered walls and minimizing the requirements for either frequent or extensive cleaning. There are a few pro-active measures:
Why Are Regular Inspections Important?
Check the rendered walls for any early signs of trouble at least twice a year (spring and fall are good times), just by looking at them. Look for:
- Traces of fine cracks or Fissures of a larger extent
- Crumbling or loose render
- Damp patches
- The early symptoms of algae, moss or mould progress
- Efflorescence
- Wear and tear at door and window seals
Why Is Prompt Crack Repair Necessary?
If you see any cracks, no matter how small, take care of them as soon as they are spotted. Water intrusion can occur through small cracks, which over time with the presence of water can cause further damage such as freeze-thaw damage, moisture penetration into the substrate and breeding ground for biological growth. Apply compatible flexible exterior filler or sealant. Larger cracks might require professional consultation. Cracks are more visible when the surface is wet, because it is easier to see a darker area around the crack.
How Does Proper Drainage Help Maintain Render?
See if gutters, downpipes and ground drainage are clear and working as they should. Leaking or clogged gutters and drains can saturate the walls, causing staining and promoting the growth of molds and mildews. Repair any leaks promptly.
Why Should Vegetation Near Walls Be Managed?
Reduce the height of any trees, shrubs and climbers growing close to or against rendered walls. Vegetation places impediments to airflow, provides shade, keeps moisture on the wall and gives pests and detritus a way to stick, which all tend to contribute to algae, moss and damp. Gently pull and take away any ivy or greenery coming out of the wall.
When Should Protective Coatings Be Applied?
A hydrophobic (water repellent) sealant or coating may be applied to some render types (weberpral monocouche render, cement render). These products form a water repellent, oil repellent barrier on masonry surfaces above the water line and can also be used to resist graffiti, dirt pick up and facilitate graffiti removal. This allows the render to “breathe”, and so the wall does not become waterlogged. Always be sure to first test compatibility with your type of render prior to application. Some modern renders, such as silicone renders, already possess natural water-resistant qualities. By sealing you will protect the render and extend its lifespan and appearance.
How Does Regular Gentle Cleaning Contribute to Maintenance?
It is true, as explained below, that some light cleaning every half year to one year can avoid a proliferation of dirt and organic matter, thus creating less of a need for a hard clean. This could be as simple as a hose down or a scrub with a light soap. Any organic growth can be controlled immediately with an biocide before it has time to spread further and discolour.
Why Is Avoiding Physical Damage Important?
Exercise caution when navigating a rendered wall to ensure it is not accidentally knocked or scraped with ladders, tools or garden equipment as these can the chip and crack the surface.
How Does Building Ventilation Affect Render?
While this is more of an internal issue, good building ventilation generally can assist with balancing moisture within the wall structure which, in turn, can have an indirect effect on the life of the render; particularly monolithic products like Lime.
These are preventive measures that homeowners can take in order to reduce the chances of severe rendering problems, make the render last longer, and keep the property looking great. Like maintaining a home, practicing the 7 Daily Habits to Strengthen Your Faith & God Walk on a regular basis can build an overall structure and consistency, much like that needed for maintaining a home.
Should You Undertake DIY Render Cleaning or Hire a Professional?
The choice between “Do It Yourself” (DIY) cleaning walls or hiring a professional service depends on a number of factors such as cost, experience, equipment and safety, and possibility of damage.
What Are the Pros and Cons of DIY Render Cleaning?
Pros:
- Affordable (maybe): Saving money on labor is why many people DIY in the first place.
- Control & Timing: You can do it on your own time and have complete control over the whole process.
- Light Cleaning: If the area is small and easy to reach, you may want to clean it yourself with simple tools (eg, soft brush, hose, mild soap).
Cons:
- Risk of Bother: It’s easy to mess it up if you’re not familiar with this type of render, with your efforts either not improving the state of the walls or damaging them. Incorrect chemicals, pressure with a washer, or harsh scrubbing can etch or discolour or strip the render. This can result in expensive maintenance works that cancel any savings made in the first place.
- Absence of Equipment: Commercial quality pressure washers, specific nozzles, ladders / towers and relevant PPE aren’t cheap to come by for a homeowner. Equipment of less quality might also be ineffective or more likely to cause damage.
- Safety Considerations: From working at height on ladders, chemicals and pressure washers, it’s important to have some consideration for safety when pressure washing.
- Time-Consuming and Labor-Intensive: It will take a lot of time to clean large spaces or remove tough accumulations.
- Inefficient Results: You may not completely get rid of all stains, and/or kill the bacteria/mold/algae spores using a DIY method, so they’ll come back more quickly.
- Dangerous Chemicals: Render cleaning Chemicals (Biocides, bleach) can be hazardous when used inappropriately, if you are untrained or not wearing the right PPE.
What Are the Pros and Cons of Hiring Professional Render Cleaners?
Pros:
- Knowledge and Experience: Professionals have a depth of knowledge in various types of render and know exactly how to clean it effectively and which solutions to use. They can evaluate the state of the render and any existing problems.
- Right Equipment: They have the industrial-grade equipment, such as the correct pressure washers, soft washing systems, and safety access equipment to clean properly and safely at height.
- Professionally Sanitized: Higher quality results are more likely with a complete and equalized cleaning, leaving behind no stains or organisms, including spores, for extended level of cleanliness.
- Safety: Workers have the training to work safely at high levels, and handle chemicals in a safe manner, preventing risk of harm or damage. They often carry insurance.
- Time Efficacy: A professional gets the job done faster.
- Preventing damage: They are trained to employ methods that clean efficiently without causing harm to render. Some can also diagnose and recommend small repairs.
Cons:
- Cost: It costs more initially to hire pros rather than the do-it-yourself method, in terms of labour and equipment.
When Should You Choose DIY Over Professional Cleaning, and Vice Versa?
DIY is suitable if:
- The space is small and intimate.
- It is not heavy soiling (like general dusting, small cobwebs).
- You know your render style and the ways you can clean it most gently.
- You are in a safe, comfortable space to work.
Hire a Professional if:
- There is a large area to render or work is at height.
- The soiling is severe and includes algae, moss, or stubborn soiling.
- You do not know what is your render type and how its cleaned/cleaned by which chemicals.
- You don’t have the tools and you’re not skilled enough.
- The render already has damage (e.g. cracks which need to be checked out).
- You are seeking that peace of mind of a professional one and looking to avoid costly misjudgments.
DIY cleaning costs Stain removal using a DIY method may seem like good value for money, and people who live in or maintain large houses sometimes opt for DIY cleaning to save money. But the costs are too great to ignore when considering the risk of over wetting or leaving detergent residue behind. Professional render cleaning services can provide a safe, effective and professional alternative to keeping your building in good condition on the outside.
What Types of Damage Can Occur if Rendered Walls Are Not Cleaned or Maintained?
If rendered walls are not kept cleaned and maintained there can be various types_of_damage and deterioration. These can have a detrimental affect on the appearance and performance of the render as well as possibly the building fabric beneath it.
- Aesthetic Degradation:
- Unpleasant look: Filthy, stained, and neglected looking walls due do the buildup of dirt, grime, pollutants, biological growths (such as algae, moss, mould). This may detract from your property’s curb appeal and even create a negative first impression.
- Staining: Staining occurs due to organic growths and pollutants which makes the slabs’ surface patches of colour (green, black, red, or grey) appear. Some renders, particularly older ones or less UV-stable types, may also cause uneven fading if not cleaned.
- Biological Growth Damage:
- The surface of the render is constantly wet due to Algae/Moss/Lichens growing on the surface. The byproducts of some species may also be acidic. The render material can eventually crumble or come off over a period of time.
- Roots Moss and some lichens have root like structures (rhizoids) which can penetrate fine cracks or a porous render and may enlarge existing fractures and provide water penetration routes.
- Frost damage: Biological growth can hold moisture, that in cold conditions will freeze and crack the render surface (expansion of ice – frost-thaw cycle).
- Issues of water Ingress and Damp :
- Cracking: When you leave cracks, even the tiniest, untreated, water can seep behind the render. This dampness can soak the substrate (such as brickwork or blockwork).
- Internal Damp: Internal damp may appear as water leaking down internal walls leading to damp patches and in other circumstances may cause direct damage to plaster and decorations whilst promoting mould growth within the building.
- Render Delamination: Regular or harsh weather elements and water behind the render can cause the render to bulge, blister or completely ‘come away’ from the wall which is called delamination.
- Harmful Effects to Render: Structural Decay of Render:
- Material Degeneration: The continuous exposure to moisture or biological growths, and pollutants can even degrade the actual render, resulting in a render that is softer and more crumbly.
- Cracks can Expand: Tiny cracks may grow if they are left alone and fester in the weather and water conditions.
- Reduced Lifespan of Render:Failure to clean or maintain drives the render through the ageing process faster. What could have been a building material used for 20-30 years or more can fail much earlier than anticipated, meaning that costly re-rendering is required decades before it should be needed.
- Health Concerns:If there is mould growing on the outside walls, and that mould is leading to internal damp and mould, there is a risk that spores will be released that will cause or worsen health problems, such as respiratory diseases, allergies, for the occupants.
- Larger Maintenance Expenditures Over Time:Letting small issues like hairline cracks or early algae to worse problems is often much more costly after the fact for repairs and fix up. An example of this would be the re-rendering of a wall which is vastly more expensive than some normal maintenance and minor cracked repairs.
This makes it all the more important to keep them in good condition by having them professionally cleaned regularly, and getting any repairs that are needed done as soon as possible.
What Other Relevant Issues Are Involved In Caring for Rendered Walls?
Is Pressure Washing Safe for Any Type of Render?
No, not all render can or should be pressure washed. Although strong cement renders can be washed down with very low pressure by a competent workman, many modern renders (silicone, acrylic, monocouche and particularly soft lime renders) will be easily scarred or gouged with a pressure washer. Dry-dash finishes typically aren’t compatible with pressure washing. Most renders should be soft washed.
What Is the Best Way to Clean Render?
The ‘right’ cleaner will depend on your render type (ie monocouche render, lime mortar render, etc) and the sort of soiling. For universal dust other than magnetic, detergent solution can be enough. For natural growths such as algae and moss, a dedicated biocide or fungicidal wash is advised. Weber CL150 or Render Cleaner Gel X Pro are products designed for render. Always try cleaner on an unseen spot first.
How Do You Know What Type of Rendering You Have?
Finding render can be tricky. The type may be indicated in the original blueprints or paperwork. Traditionally, cement render has little aesthetic quality, being flat and painted (if through coloured). Monocouche is frequently through-coloured and can be scraped or textured. Texture finishes can be achieved with acrylic or silicone renders, and many of these are through-coloured. Lime render is common on older properties and has a softer, more traditional appearance. If in doubt, consult a rendering expert or surveyor before you start washing like a maniac.
Do You Need to Paint Render After Cleaning?
Render doesn’t always need painting after cleaning. If the render is through coloured (monocouche, silicone, acrylic) due to the nature of the clean work, the base colour should not be affected The only exception being painted finishes. But if the render had previously been painted and the paint is old or flaking or chipped by the power washer, then again you may need to re-paint. Stubborn stains that are unable to be removed during washing may also require you too repaint the gate for a consistent appearance.
Why Are There Green Algae on Render?
Green algal growth on render walls is largely due to a mixture of moisture, shadow and the occurrence of nutrients. North-facing walls, underneath trees or beside another building, leaking gutters or surfaces that remain wet for days are especially susceptible. Spores of algae circulate in the air and will take up residence on appropriate moist surfaces.
Is It Ok to Use Bleach to Clean Render Walls?
It can be risky – if not illegal – to apply certain household solutions to render with or without a coating, so test it in an inconspicuous spot first and regularly throughout the remediation process by diluting 10% bleach (sodium hypochlorite) with 90% water and retesting that spot to check for bleaching. But use it very carefully. It can stain or erode some types of render, particularly coloured renders or less durable substrates. And always cut it with water — diluted by at least 1 part bleach to 3-4 parts water (or more), tested in an inconspicuous area first, then followed by a thorough rinse. In these cases, specialist biocidal cleaners might be a better alternative.
How Long Does Render Last?
Finish lifespans Render can have vastly differing lifespans depending on the type, quality of application, exposure and maintenance. A typical cement render will hold up for 20-30 years given proper maintenance and painted. Many modern polymer renders (eg acrylic and silicone renders) will have a life expectancy of 20 years or more with some manufacturers suggesting life-spans of 25-30+ years with correct maintenance. If you have a grass carpet, it last longer if you perform a regular cleaning and maintain it.