Rendered walls become stained and damaged over time as the weather, pollutants and wear take their toll. The life of these walls is also long or extended if they are maintained well. Keeping your floor clean means when something is spilled, it can be quickly wiped up before it stains; clean floors either mop or wipe-up easily.
A durable render will not only see your property look appealing, but it will also retain your property’s value and structure by keeping it in good condition. Different render finishes require different maintenance – concrete renders will need looking after differently to newer sillicone systems. In this article we are going to learn how to clean and maintain various types of render, know what these issues are and how we can make them go away!

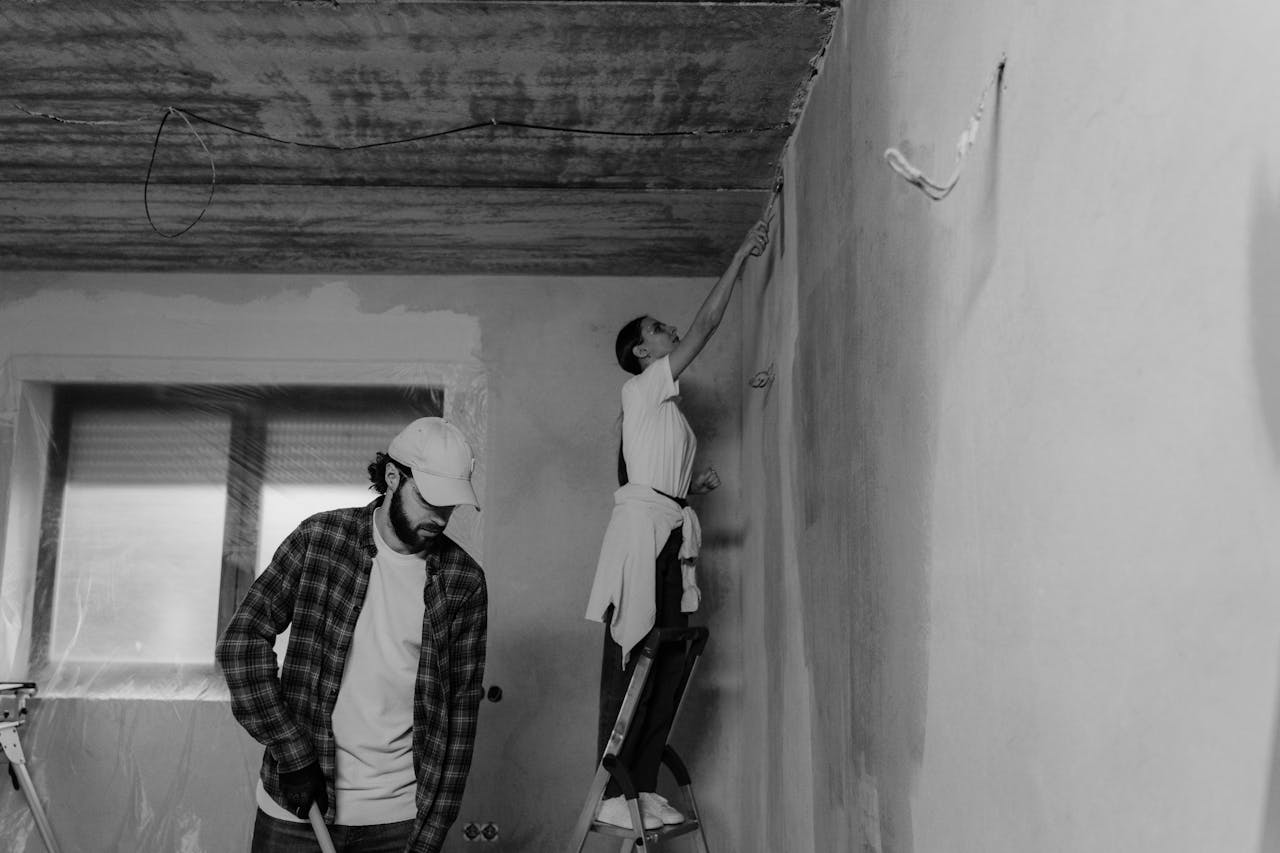
What’s the best way to clean rendered walls?
How to clean rendered walls If you want to perfectly clean your rendered walls, make sure to know your render type since all of them are treated differently. Cement renders can be washed with a 30-50 bar pressure washer, while lime renders must be washed by hand with a soft water brush. Acrylic and silicone renders can be kept clean using soapy water and soft cloths.
For general cleaning:
- Brush down dirt – Brush down the wall with a soft brush to remove dirt, cobwebs and loose particles.
- Use cleaner solution – combine the right cleaner for your type of render:
- Cement render: Gentle soap solution or render cleaner if available
- Lime Render – pH balanced cleaner ONLY
- Render Products Today: What We Recommend Side-by-side comparison Mixing and Application Video 1 – Tools for Mixing Kaumagraph™ Additive Mixes (Gamma 400 P) with SandTools for Spraying Base Coat (Gamma A)Application EquipmentCleaning ToolsModern Renders – How We Do It Protect your work!
- Clean the surfaces – Work from top to bottom in 1 – 2 m wide strip sections by the suitable methods:
| Render Type | Best Cleaning Method | Tools Needed | Precautions |
|---|---|---|---|
| Cement | Washing or spraying with water under reduced pressure | Pressure washer, stiff brush | Pressure not more than 50 bar, distance 30 cm |
| Lime | Hand washing only | Soft bristle brush, sponge | Do not use a pressure washer to clean and stay away from acid cleaning solutions |
| Acrylic | Gentle washing | Soft cloth, soft brush | Keep surface fresh, Scrubbers may scratch surface: Test first, avoid scratches |
| Silicone | Mild detergent wash | Soft cloth, gentle sprayer | Wash well No scrubbing required |
- Treat organic growth – For algae, mold, or lichen, use the following biocide treatment:
- Use fungicidal wash as directed by the manufacturer
- Give Product Pros Recommended Dwell Time (Usually 24-48 hours)
- If product calls for it, rinse well
- Rinse well – The clean water rinses beneath removes all product residue to eliminate streaking.
Pro tip: Always try out your cleaning technique on a small patch first (in an out-of-the-way corner) to make sure you don’t harm the render.
How frequently should rendered walls be washed?
Rendered walls CBC needs cleaning between 12-24mths depending on its environment and the type of render used. Walls located in costal areas or in high pollution areas should be washed more regularly (every 6 to 12 months). For properties in wooded areas or high-moisture environments, clean your gutters 12 times a year to prevent rot faster organic growth and damage to the gutters.
Modern renders that repel algae can be left longer between cleans, some silicone renders will remain clean for up to three years in the best conditions but are a little more expensive to apply. We recommend rural properties that have very few pollutants need cleaning every 18-24 months.
Implement no matter how much dirt can be seen, preventative treatment staves off stubborn stains.
What are the 5 most encountered problems with rendered walls?
There are 5 popular issues inherent in rendered walls that require targeted repair methods:
- Cracking – Cracks can die to movement, poor application, or extreme temperature changes. Wide, hairline cracks (under 2mm) in fill in with flexible filler to match the render colour. Major cracks are a sign of structural issues that should be examined by a professional.
- Algae and mold – Dark green or black patches typically found on north facing walls or those with lots of shade present. Treat with a fungicidal wash, unblock drainage around affected areas and apply algae-resistant paint.
- Stains and discoloration – Staining results from pollution, water runoff and from the metal portions. Wash Limit cleaned by suitable products for the staining type oxalic acid (not onto lime render) for rust stains, dedicated cleaners for organic stains. Install correct drainage systems to avoid repeat.
- Bubbling/blistering – built up moisture in the render leads to sections of the render being pushed out of the wall. Approximately 7.5-12mm as per AS4773, remove affected render fully, find & repair cause of moisture, make sure wall is dry, re-render with correct render.
- Efflorescence — When water-soluble salts move to the surface, white crystaline deposits become visible. If depositing is in form of dry-salts – remove with stiff brush: repair moisture source causing migration; or apply a suitable breathable sealer to suit render type.
How do I fix a broken rendered wall?
For patching damaged raked render match point repair materials to the existing raked rendered wall to ensure continued raked render uniformity and performance. For small crack repairs:
- Use a scraper to gently open the crack a little bit so the filler will make some good glue
- Dust off loose dirt and debris with brush or vacuum
- Wet the wall with clean water (prior for cement renders.
- Trowel in with pointing trowel the necessary repair material
- Texture the cement patch to blend it in with surrounding render (whilst it is wet)
- Permit to fully cure (based on product recommendations typically 24-48 hours)
For larger damaged sections:
- Remove damaged portion with an angle grinder – Cut to form a square or rectangle.
- Stripping away render to expose the sound substrate.
- Clean and prepare substrate
- Apply bonding agent if needed
- Mix new render to match original as shown.
- Apply in successive coats (number varies depending on render type)
- Texture to match existing texture
- Cure as render type dictates
- Think about full wall repainting for uniform color purposes
What equipment is required for the reder maintenance?
The following are the 15 essential products you’ll need to complete the task of maintaining your render:
- Soft bristle brush– Loosens dirt and grime without leaving scratches
- Quantity garden hose with spray nozzle -Allows for controlled water flow to clean and rinse
- High pressure cleaner (with adjustable settings) – For cement renders only
- Buckets – Used to mix cleaning solutions and repairs
- Safety gear – Gloves, eye protection, dust mask
- Pole extension – Access those hard to reach spots the safe way
- Specialist render cleaners – Depending on the type of render you have
- Treatment fungicidal – Removes organic growth
- Render repair kit – Consisting of fillers and patching compounds
- Trowel tip – For accurate application of repair materials
- Hawk (plasterer’s) – Holds a deal of material in its trough and helps to write down; the plasterer places their other hand on top of the hawk to push material from the hawk to the wall.
- Render tools and finishing tools – to match texture.
- Scraper – Removes Loose material
- Drill & paddle with paddle – for bigger patch-up mixes
- Gun for sealant – Apply pliable sealer as required
Ballers means better baller life.Maintenance is better and so are the repairs and that really allows for longer renders.
How can I stop algae/mould growing on rendered walls?
How To Stop Algae And Mold Growth On Rendered Walls 7 Proven Ways To prevent algae and mold forming on rendered walls, you can follow these 7 tried and tested methods:
- Improve drainage – Make sure you have effective guttering to take water away from walls and rectify any ground level drainage issues that may be splashing water back onto render.
- Prune foliage – Ensure that there is a minimum of 30cm between plants and solid surfaces to allow free airflow and deter moisture retention.
- Preventive treatments – Apply appropriate algae resistant/suppressant paints or treatments (those containing metallic compounds such as copper or zinc) which are designed to prevent bio growth for 3 – 5 years.
- Common cleaning – Conduct checks every three months and remove early growth before it gains a foothold.
- Remediate moisture sources – Repair leaking pipes, overflowing gutters, or condensation that creates a wet environment.
- Install adequate ventilation – For internal renders of walls, good ventilation is required to minimize condensation.
- Opt for suitable render – If you are replacing render it should be modern silicone or acrylic ’s with an added biocide protection.
It is far less expensive to apply preventative treatments regularly than it is to fight an organic growth problem that has already taken roost.
What are the causes of the durability of the rendered walls?
There are 8 key elements which determine how hard wearing a render is. Its minimum performance comes from the quality of the render – higher grades of render have bond-improving agents and properties that make them more elastic and water-resistant. Method of application has a dramatic effect on bond strength–correct application in the right weather conditions will eliminate future failures.
Environmental factors are also important – properties in coastal areas are exposed to salt, while those in urban areas are subjected to pollution. And the more persevered neat will last – ignored neat will age quickly. The quality of the substrate is the basis – coatings on loose or wet substrates fail sooner or later, regardless of quality.
Design elements such as reasonable roof overhang, effective drainage, and flashings all contribute to the renders’ protection from excessive water penetration. Render longevity is greatly enhanced through the use of surface treatments (silicone water repellents, anti-carbonation coatings). Lastly, the local climate defines types of stresses – cycles of freezing-thawing are of other nature in colder zones than high UV light exposure in hot regions.
Frequently Asked Questions
What are the 5 common types of wall renders?
Altogether there are five main types of wall rendering: cement render ($25–$35/m²), lime render ($30-45/m²), acrylic render ($35-50/m²), silicone render ($45-65/m²), and monocouche render ($40-55/m²). Cement is old-school but prone to cracking, lime is breathable for heritage buildings, acrylic is versatile, silicone is top of the range for water resistance and monocouche is pre-coloured for applying in one coat.
How much is professional render cleaning?
Professional render cleaning prices start from $5-15 sqm. Price depends on wall access, heaviness of soiling, render type and property location. You’ll pay less for ground-floor walls than walls that require scaffolding. A reduction in per-meter costs because of the scale of larger jobs. Protective coating treatments cost $3 to 8 for each square meter.
How long do various types of render last?
Cement render has a life span of 20-30 years when repainted every 5-7 years. Lime render lasts 25-40 years when maintained. Acrylic render is up to 25-35 years longevity 10-15 years color fastness. Silicone render life spans are 30-50 years with 15-20 years colour fast. Monocouche render is expected to last for 25-40 years (with stability of colour for 15 years). Life expectancy is shortened 15-25% along the coastlines.
What type of render is best for coastal homes?
For coastal homes, silicone render is an ideal choice as it is much more resistant to salt, water and it is flexible in the face of harsh, coastal winds. Over acrylic render containing salt-resistant glue is a middle-ground option. Cement krend is not up to the task on the coast. Modern additives may supplement specially formulated lime renders to be appropriate on historic coastal buildings.
What 3 solutions can I use to clean rendered walls naturally?
Three green alternatives: (1) Hot water steam cleaning ($75-$150 for days worth of rental) that eliminates bio-growth without chemicals, 90-150 °C steam that effectively kills molds and other living can live such as dust mites; (2) Apply a sodium bicarbonate solution of 1 cup/4 litres warm water, let stand 30 minutes, then clean with mixture before rinsing – an ancient method used for black mold on ship hulls; (3) Use an enzymatic cleaner ($15-$30 per litre) that breaks down organic matter but doesn’t have powerful chemicals.


