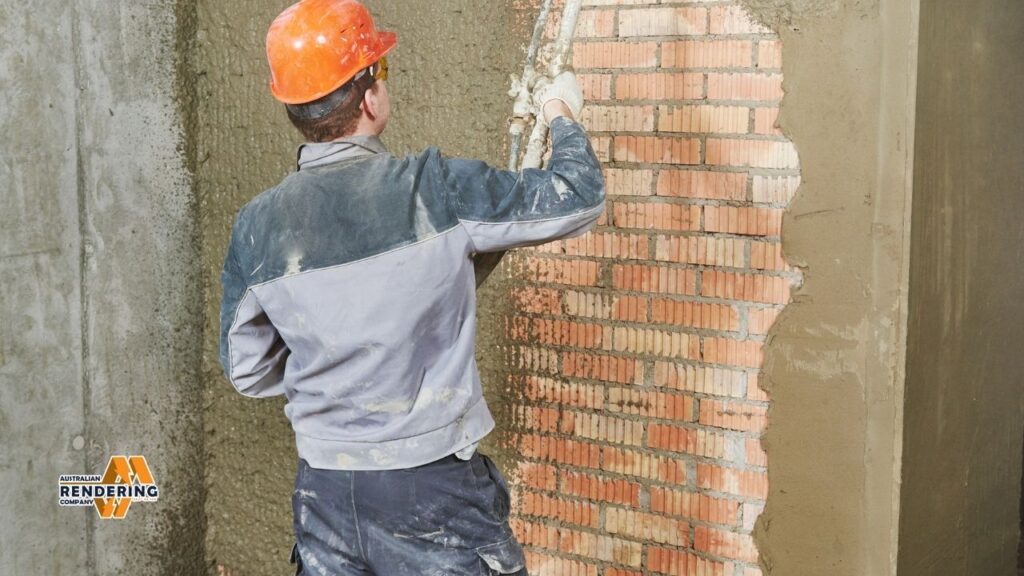
A brick wall may be rendered to reduce the kaleidoscope of colours and texture to an even, neutral tone and texture, but it may also be to protect the brickwork, if the brick is too soft or friable or the wall is in an exposed location. Rendering a brick wall is a perfect guide on how to render and it lists the different materials and tools used.
Preparing to Render
Before you begin, gather everything you need. Good prep work is going to make the job faster and result in better results.

What You Need: Materials and Tools
- Cement mixer or similar 4 to 5-gallon mixing tub
- Shovels and buckets
- Hawk and trowel
- Spirit level
- Measuring tape
- Dust sheets and masking tape
- Scaffolding or a solid ladder
- Personal protective equipment (PPE) such as gloves and eye protection
- Acrylic render, lime render or cement render
- Water
- Optional: render the colour with colour pigment.
Surface Preparation
- Cleaning the Brick: Scrub away any loose dirt, moss or grime with a wire brush. For stubborn stains, scrub using caution with a pressure washer.
- Fix Mortar Damage: Repair and add new mortar where needed. Allow the mortar to dry before plastering.
- If it is available, coat the wall with a Bonding Agent: This will help the render to grip to the brick. Follow the bonding agent’s directions.
- Protect Area: When it comes to rendering a wall, do yourself a favour and cover up anything that you don’t want to get covered in render (windows, doors etc) with plastic sheeting and masking tape.
Different Types of Render
It’s pretty important to pick the right render. Each variety has unique characteristics.
Cement Render
Cement render is durable and waterproof, but it will still absorb water. It’s good for outdoor walls. Cement render consists of cement, sand, and water. If not mixed and applied properly, it can crack.
Lime Render
Lime render is also a more breathable material than cement render. It allows moisture to get out, which helps resist damp. Lime render is less brittle, such that it is able to flex and crack less. This lends itself well to fixing up older buildings. If you did wonder how to lime render a brick wall, just keep in mind that it dries and cures much slower than cement render.
Acrylic Render
Acrylic render is somewhat flexible and is less prone to cracking. It is applicable in thin layers. It also comes in many colors. Rendering Contractors Melbourne Australian Rendering Company in Melbourne specialize in professional acrylic rendering, cement rendering and cladding homes that protect it from the harsh environment. Call on 0466 943 872, or email at contact@australianrenderingcompany.com.au to get in touch with these folks.
How to Render an External Wall from Start to Scratch: Do It Yourself
Here’s how you can render a brick wall yourself, step by step.
Mixing the Render
- Follow the instructions: Read the instructions on the render bag. Add the right amount of water to render.
- Combine Dry Ingredients: Combine the dry render ingredients in a cement mixer or tub.
- Add water gradually: Add water gradually, mixing in between to form a smooth uniform mixture. The mix should cling to your trowel, but not be overly runny.
Applying the Render
- First coat (scratch coat): Apply a thin, even layer of render to your wall with a trowel. Give it a good push to help it adhere.
- Scratch the Render: Scratch a nail float or scratching implement across the surface in horizontal lines. This will help the next coat adhere. Allow the scratch coat to dry for 24-48 hours.
- Second Coat (Float Coat): Place a second coat of plaster roughly the same thickness as the first. Smooth with a float for an even surface. Allow 24-48 hours for the float coat to dry.
- Third Layer (Finish Coat): If a third coat of render is required, apply a thin third coat. This is your finish coat. Finish smoothly with a clean float for a professional finish.
Curing the Render
- Keep it Wet: Spray the render with water every now and then for the next few days. This enables it to cure slowly and eliminates the possibility of cracking.
- Protect From Sun and Wind: If it’s very sunny or windy, cover the rendered face of the wall with a plastic sheet.
Rendering Certain Brick Structures
You could also be contemplating methods to render a brick chimney or fireplace, or perhaps a brick garage or shed. The fundamentals are similar, but here’s what to keep in mind for each:
Brick Chimney Rendering
- Safety First: Work at any height without fear! Use scaffolding and follow safety rules.
- Weather Protection: Chimneys are vulnerable to the weather. An excellent waterproof render such as cement render can be used.
Brick Fireplace Rendering
- Heat Resistant: Utilize a render suitable for use with heat. Certain lime-based renders are okay.
- Aesthetics: Consider what the finished fireplace is going to look like with your room. Pick a color and texture that works.
Rendering of a Brick Garage and Shed
- Structural Check: First of all, check that the garage or shed is structurally sound before you render it.
- Water-resistant: Garages and sheds can also use some good water-resistance. You might want a waterproof render or sealant instead.
Rendering Interior Brick
If you want to make your interior brick walls look more stunning, you can render them. You might be required to add a bonding agent to help the render adhere. Opt for a breathable lime-based render finish, or for more flexibility in colour and textures, choose an acrylic render. Do the same as painting an exterior wall, lay on a little at a time and ensure it is dry before adding the next. Good curing is the key to preventing cracking.
Professional Touches
- Work in Sections: Don’t let the render dry before you can get to it.
- Regularly Clean Your Tools: This way, you are able to spread the render easily.
- Leveling: Make sure that your render is level as you work your way up. This stops uneven surfaces.
- Practice: Render a small and concealed space first to get the feel for it.
How to Render Over Brick
But sometimes you have to render over brick. Rendering to return a wall to look like new involves a few extra steps, but a similar process. No matter if you are considering how to render over a brick wall or how to render over an old brick wall, preparation is definitely the key.
Preparing the Old Brick
- Clean Surface: Clean away loose material, dirt or old paint.
- Restoration: Repair damaged bricks, buildup, or cracks.
- Apply Bonding Agent: Apply bonding agent to facilitate the adhesion of render to old brick.
Troubleshooting Common Issues
Cracking
- Cause: Excessive water in the mix, render drying too rapidly, or movement in the wall.
- Solution: Mix the render properly, cure it adequately, and correct any structural issues in the wall.
Render Not Sticking
- Cause: Wall dirty or greasy, material not used with bonding agent, or render being applied too thickly.
- Solution: Clean the wall well, apply a bonding agent and apply the render thinly.
Uneven Finish
- Cause: Failure to level, clean tools or practice.
- Solution: Use a level, clean your tools often, and try it out on a small section first.
Rendering Over Existing Paint
Making good a painted brick wall? Here is the easiest solution out of many: Remove flakey paint, apply bonding agent, use acrylic render to prevent cracking. Cement render isn’t great applied straight onto paint.
How to Apply Over Various Types of Bricks
Think About Porosity of Bricks: Bricks take in water in varying degrees. Very porous (permeable) bricks might require a size coat of ‘size’ in order for good adhesion.
Looking After Your Rendered Wall
- Routine Cleaning: Scrub wall with water and soft brush to remove dirt and moss.
- Address Cracks Immediately: If it’s small, fix the crack now before it becomes larger.
- Re-render if Necessary: Several years down the line, you may find that you need to re-render the wall.
Considerations
- Weather: Do not render in harsh weather. The render can be affected by excessive heat, rain or freezing weather.
- Building Regulations: Make sure you have the right to render your wall. Some places have guidelines on the look of buildings.
Choosing the Right Color
- Consider Your Home’s Style: Select a color that matches your home’s style.
- Consider the Environment: Opt for a color that will blend into the environment.
- Sample Remaining Colours: Test colour samples on a small section before painting the whole wall.
Rendering Brick Cost
- DIY vs. Professional: Doing it yourself saves you labor costs but requires know-how. Quality and speed are assured by professionals.
- Cost of Materials: Cement render is generally less costly than lime or acrylic render.
- Project Size: The bigger the area, the more you have to pay since more material and labor is required.
Factors for Old Buildings
- Letting the building breathe: Old buildings have to breathe. You need to be using lime render to avoid the moisture problem.
- Impact on structure: Old walls can be damaged by heavy cement render. Consult with a structural engineer.
Achieving Different Textures
- Sand Finish: The first coat should be sanded to remove raised grain, and then used as a base for the subsequent coats.
- Fine Texture Finish: Apply with a steel float.
- Roughcast: Hurl the render onto the wall for some texture.
Health and Safety
- Dust: Always wear a mask when sanding render.
- Contact with Skin: Use gloves to avoid exposure to render.
- Eye Protection: Goggles or safety glasses should be worn to prevent eye splashing.
How long does it take render to dry on brick?
Render should look as good as new for many years; a well-maintained render could last you even 20-30 years or even more! Its life can vary depending on the type of render, but typically it should last decades when properly applied and exposed to the weather.
Can you render wet brick?
Wet brick is not the best choice to render. Moist brick can keep the render from adhering as it should and cause it to crack or peel. Wait for the brick to dry.
Which render is best for old brick walls?
For old brick walls, lime render is usually the right choice. It’s breathable, which also allows moisture to escape, preventing it from getting trapped and preventing damp and brick damage to begin with. Cement render also has a tendency to harbor moisture and leads to many problems in older buildings.
Do I need planning permission to render a brick wall?
It’s going to depend on where you live and the specific rules in your area. In some places, there are rules about changing the look of buildings, especially in conservation areas or in listed buildings. Consult your local planning department before undertaking any work.


