
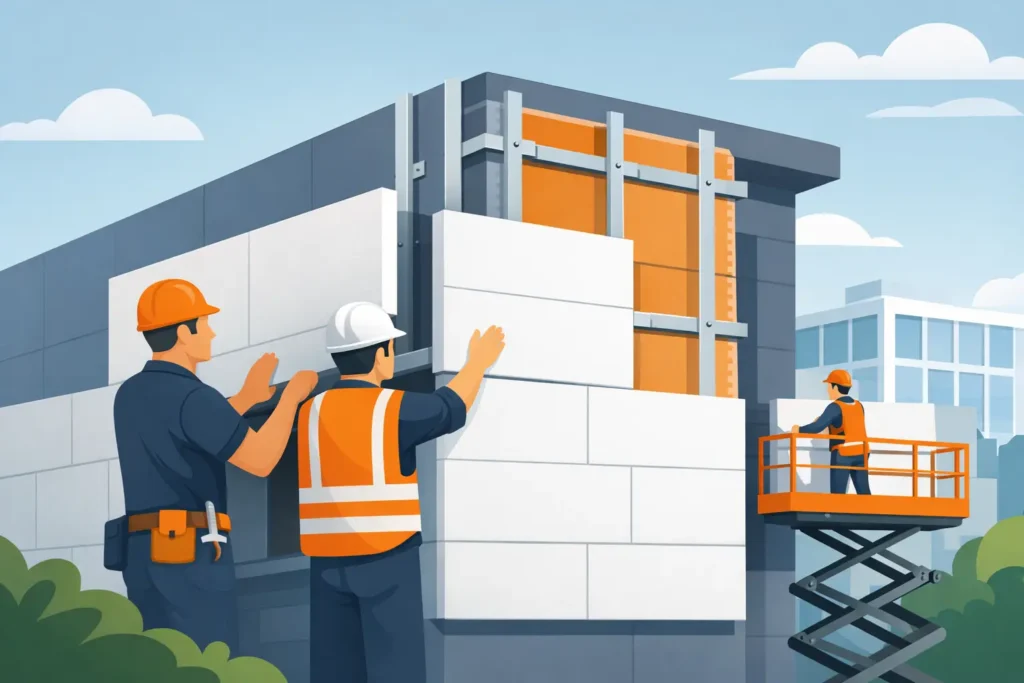
A well-finished Hebel façade can give a property a clean, modern appearance while improving thermal performance and reducing the maintenance demands of older exterior surfaces. But the finish is only as dependable as the work behind it. This hebel installation guide for facades explains the key stages that protect the building from movement, moisture and harsh weather - and why each stage needs to be completed as part of an approved system.
Hebel is an autoclaved aerated concrete product. It is lighter than conventional concrete and commonly used for external wall cladding, boundary walls and selected building systems. Its performance relies on accurate set-out, suitable structural support, approved fixings and a compatible coating system. Treating it as a simple panel-and-render job is where costly problems begin.
Start with the right façade system
Before panels arrive on site, confirm exactly which Hebel system has been specified. External cladding panels, power panels, blocks and wall systems have different fixing methods, joint details and finishing requirements. The supporting structure also matters. A timber frame, steel frame, masonry wall and concrete substrate each require an approach suited to their condition and design.
The project should be checked against the relevant National Construction Code requirements, engineering details, manufacturer specifications and local planning conditions where applicable. Wind exposure is particularly important in Melbourne, where a sheltered suburban wall and an exposed upper-storey elevation can experience very different loading conditions.
At this stage, a professional installer will also identify penetrations, windows, doors, parapets, downpipes, meter boxes and changes in wall height. These details should be resolved before cladding starts, not improvised after panels have been fixed.
Site preparation and set-out
A straight, durable façade begins with a sound substrate. Frames must be plumb, level and properly braced. Existing masonry should be structurally sound, dry and free from loose render, contaminants or failing coatings that could affect the specified fixing method.
Set-out is more than marking where panels will sit. It determines panel direction, joint locations, cut sizes and how the façade meets corners and openings. Starting with full panels in prominent areas usually produces a cleaner result and avoids narrow, weak-looking pieces at visible edges.
Allowance must also be made for movement. Buildings expand, contract, settle and respond to temperature changes. Hebel panels and the finishes applied over them need movement joints in the correct locations so that normal building movement is managed rather than transferred into the rendered surface as cracking.
Keep water management ahead of the cladding
No façade installation should begin without a clear plan for water. Flashings, sarking or wall wrap where specified, cavity drainage, sill details and penetrations all need to direct moisture outward. Render and paint provide weather protection, but they are not a substitute for properly detailed flashings.
Particular attention is needed above windows and doors, at roof-to-wall junctions, around balconies and where different materials meet. Water entering behind a façade can lead to staining, coating failure, corrosion of fixings and damage to the supporting structure. These are not cosmetic issues, so prevention is far more cost-effective than repair.
Hebel installation guide for façades: fixing the panels
Panels should be handled carefully and stored in a dry, stable location to prevent edge damage and unnecessary moisture exposure. Damaged panels, incorrect cuts or poorly aligned boards may compromise the finished appearance and create weak points in the coating system.
Fixing must follow the approved system details. This includes the correct type, spacing and depth of screws or other fixings, as well as any required adhesives, packers or support angles. Fixings need to suit both the Hebel product and the substrate behind it. A fastening approach that works on a steel frame may not be suitable for timber or masonry.
Installers should work progressively, checking level, plumb and panel alignment as they go. Trying to correct an uneven wall later with a thick layer of render is not proper workmanship. Excessively thick render can create its own stresses, affect drying and leave an inconsistent finish.
Openings require extra care. Panels should be cut cleanly, and the specified reinforcement and detailing must be used around corners where stress tends to concentrate. Poorly detailed window corners are a common source of cracking because the opening interrupts the continuity of the wall.
Joints, reinforcement and movement control
The jointing stage is where a Hebel façade becomes a continuous prepared surface rather than a series of individual panels. Panel joints are filled and treated using compatible products, then reinforced where the system requires it. Reinforcing mesh is embedded into the appropriate base coat, particularly across joints, corners, openings and transitions between materials.
Mesh must sit within the render layer, not simply lie on the surface. It needs sufficient overlap and full embedment to distribute stresses effectively. Corners and exposed edges also require proper corner beads or reinforcing details to improve impact resistance and maintain clean lines.
Movement joints must remain functional. They should not be bridged over with rigid render, mesh or paint. Their purpose is to allow controlled movement, and concealing them may look tidy on day one but can result in cracking later.
It also depends on the building design. A small single-storey façade may have straightforward joint requirements, while a larger commercial elevation, long wall run or multi-level project will need more detailed coordination with engineering and architectural documentation.
Applying the render and coating system
A Hebel façade needs a compatible coating build-up, not an arbitrary render selected by colour chart alone. The system generally includes a prepared base coat with reinforcement, followed by a suitable texture coat and protective exterior paint or finish. Each layer has a specific role in adhesion, crack resistance, weather protection and appearance.
Drying times are not optional. Rushing between coats can trap moisture, reduce adhesion and affect the uniformity of the final texture. Weather conditions also influence the work. Very hot days, rain, strong winds and cold temperatures can all affect curing, so experienced contractors plan application around the conditions rather than forcing the job through.
Texture selection should suit the building and its surroundings. A finer finish can create a sharp contemporary look but may show surface imperfections more readily. A heavier texture can help disguise minor irregularities, although it may hold more dirt in exposed locations. The right choice balances architecture, maintenance expectations and the existing style of the property.
Common shortcuts that cause façade problems
Most Hebel failures are not caused by the material itself. They are caused by skipped preparation, incompatible products or details that were treated as minor. Watch for these warning signs during planning or construction:
- panels fixed without confirming the supporting frame or approved fixing schedule
- missing or poorly formed flashings around openings and roof junctions
- movement joints covered with render or mesh
- inadequate reinforcement at panel joints and window corners
- render applied too thickly to hide uneven installation
- coatings applied before base coats have cured properly
A clean site is another practical indicator of care. Panels, render materials, offcuts and dust should be managed throughout the work. Good trade practice protects windows, paving, garden areas and adjacent finishes, then leaves the property tidy once the façade is complete.
When to use an experienced façade contractor
Hebel cladding is not a material to guess your way through. It requires coordination between the building structure, moisture management, panel installation and rendered finish. For renovations, crack-prone walls, exposed elevations or projects with multiple openings, professional installation is the sensible investment.
Australian Rendering Company approaches Hebel and rendered façades with the same focus applied to every external finish: correct preparation, compatible materials, clean workmanship and details built to perform over time. That matters in a climate where heat, wind and driving rain can quickly expose poor installation.
Before committing to a Hebel façade, have the wall design, existing substrate and drainage details assessed together. A properly planned installation does more than improve street appeal - it gives the finished surface the support it needs to stay sound for years to come.