The cement render mix ratio is even more critical for any project. If you don’t get the mix right, the render can crack, fall away or look poor. This handbook provides the nitty-gritty of how to get the right render mix ratio, ensuring that your walls are strong, smooth and (hopefully) crack-free.
What is Cement Render?
It’s sort of like a skin for a wall, a blend of cement, sand and water that adheres to brick, concrete or other surfaces. It dresses up walls and keeps away the weather. It’s about getting the cement rendering mix right if you want it to last. Australian Rendering Company is an expert company offering rendering services across Melbourne and has been in business for more than 30 years and stresses how important proper mix proportions are for long lasting and clean finishes.

Why the Render Mix is so Important
- Strength: Using the correct render mix ratio a quality render mix makes a render that is stronger and non-crack.
- Workability: A good render mix will be easy to spread and work with.
- Longevity: Good render mix ratios make for a long-lasting render, even against unfavourable weather conditions.
- Finish: The correct rendering mix ratio provides a smooth and good cement rendering mix proportion.
Ingredients for Cement Render
To render cement, you will need:
- Cement: The thing that keeps everything in place. Use the regular Portland cement (OPC).
- Sand: This is what gives the liquid some body. Use clean, sharp sand. Washed river sand is often even better.
- Water: This is what gives the mix its consistency. Use clean, drinkable water.
- Additives (optional): They can alter the way the render performs. They may help it stick better, or dry faster.
Mixing Ratio for Render
The mix for render is the same as the mix for building a foundation, even if you’re just using render to cover a wall. The standard combination is 4 parts sand to 1 part cement (4:1). But, of course, this could vary depending on the role. Let’s find a mix for rendering!
Nominal Blend Ratio (4:1)
- 4 parts sand
- 1 part cement
- Enough water to create a soft mix
This mix of sand and cement render is suitable the majority of the time. It’s sturdy and simple to manipulate.
A Higher Render Mix Proportion (3:1)
- 3 parts sand
- 1 part cement
- Enough water to create a usable paste
It is stronger but may crack more easily than the other common sand cement render mixes. Whip it out when you need the extra strength.
Thin Layer of Render Mix (5:1 or 6:1 ratio)
- 5 or 6 parts sand
- 1 part cement
- Sufficient amount of water to form a workable paste
It is a weaker sand and cement render mix, but it should not crack as it is more flexible. It serves well on softer surfaces.
How to Make Cement Render (in the order you’ll need it):
Follow these easy steps to mix your cement render accurately. Here’s how to mix render:
- Get Your Gear: You will need a mixer (or a wheelbarrow and shovel), buckets, a measuring tool and safety gear (gloves, mouth mask and eye protection).
- Measure Ingredients: Mix up the correct cement render recipe. For instance, if the concrete is for a 4:1 mix, then 4 buckets of sand will be needed for every bucket of cement.
- Mix The Dry Ingredients: Place the sand and cement into the mixer or wheelbarrow. Stir them well so the color is even all over.
- Slowly Retain Water: Slowly add in the water while combining. How to mix cement render? Add just enough water to make a dough that holds together but is not soggy.
- Stir Well: Stir for a couple of minutes to ensure all is stirred evenly. The mixture should be smooth and spreadable.
- Scoop It for Consistency: To test it, use your trowel and scoop a portion of the mix. If it sticks rather than falling off, it’s good. If too dry, add more water. If the mix is too wet, add more sand and cement to the correct render mix ratio.
Tips for Mixing Cement Render
- Only use clean tools and buckets.
- Combine in the shade so that the mix does not dry too quickly.
- Don’t mix too much at once. It’s best to combine small batches so the mix doesn’t dry out before you have an opportunity to flip it.
- If you are using something like a hardening additive, follow the instructions on the package.
What Influences the Render Mixture
There are a few things that can affect the way in which to mix sand and cement for rendering:
Weather Conditions
- Hot Weather: The mix will bake out more quickly. You may have to add more water or work in smaller sections.
- Cold Weather: The mixture will dry slower. Ensure the render does not freeze.
Surface Type
- Porous Surfaces: A porous surface absorbs water fast. It’s possible you’ll need a more concentrated mix, or that the surface simply needs to be wetted down first.
- Smooth Surfaces: Smooth surfaces won’t hold on much! You may need an additive to make the render stick.
Sand Quality
- Swept Sand: It is a stronger mixture. And sand can be dirty, so make sure it’s clean.
- Sharp Sand: This will give better grip to the mix. Coarse sand has sharp edges which locks together.
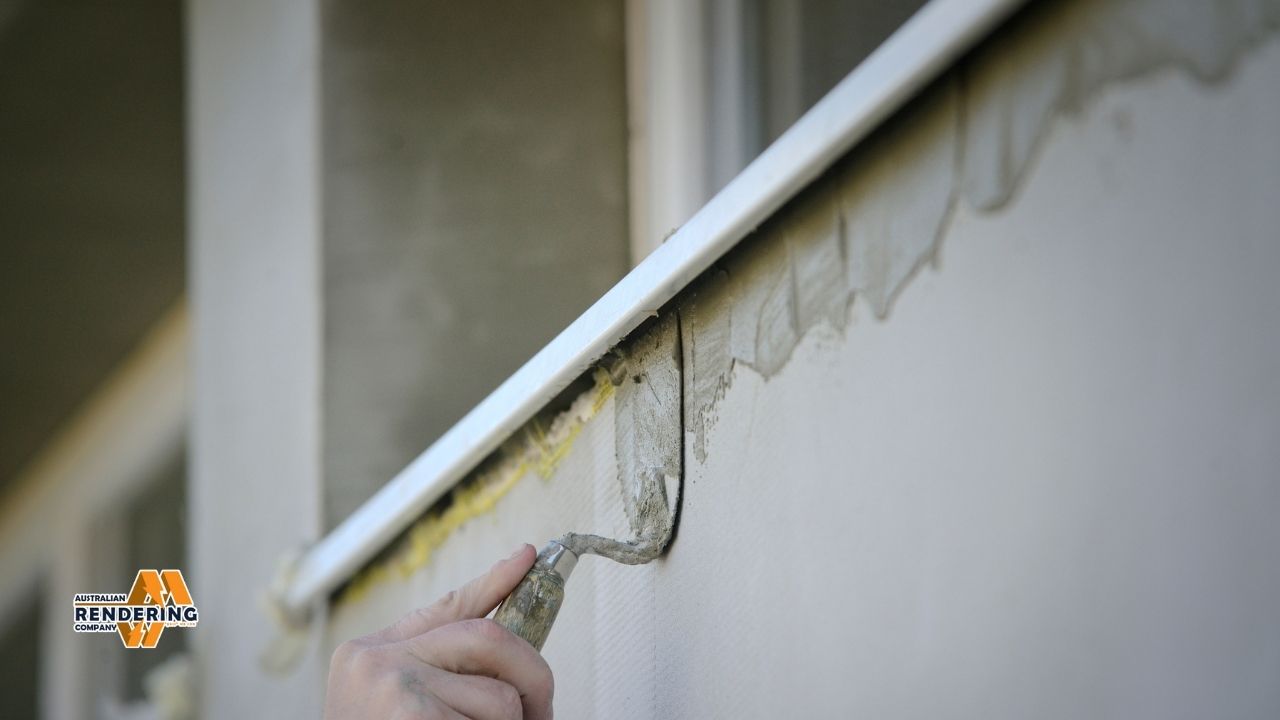
Common Render Problems And How To Troubleshoot Them
Cracking
If the render mix is too wet or the render dries too quickly, cracking can occur. To fix it:
- Use the right mix ratio.
- Keep the render wet as it dries.
- Do not render in direct sunlight.
Poor Adhesion
Bad adhesion means that the render doesn’t adhere to the wall. To fix it:
- Ensure the walls are clean before rendering.
- A bonding agent can help the render stick.
- The surface should be a little gritty.
Uneven Finish
The surface can come out uneven if the mix isn’t smooth, or if you don’t spread it evenly. To fix it:
- Mix the render well.
- Apply enough render to cover the entire surface with a trowel.
- Use a float to scratch out any high spots.
Other Options in lieu of Standard Render And Cement
Acrylic Render
Acrylic render contains acrylic resins to make it easier to use and also more flexible and water-resistant. It’s not as prone to cracking as a cement render.
Polymer-Modified Render
The polymer-modified render is a type of render with added polymers which makes it stronger and more flexible. It’s good for surfaces that are in motion or vibrate.
Lime Render
Lime render also is known as Lime stucco. It is designed to be used in place of cement. It’s also more breathable and flexible, which can help to minimize cracking. How do you mix sand and cement render with lime?
Cement Render with Additives
Additives in cement render can also alter and improve workability, adhesion, and durability.
What is the Recipe for Sand and Cement Render When Additives are Used?
Never forget to refer to the manufacturer’s instructions when using additives, since they may affect desired mix ratios.
Smooth Render Finish
How to get the best results?
- Preparation is everything: Start with a clean, lightly damp surface.
- Even Mix: Always mix your render well for a consistent mix.
- Even Distribution: Apply with a hawk and trowel.
- Use a Float: Employ a plastic or sponge float for professional results.
You can achieve that smooth finish, that lasts longer, increasing the aesthetics and strength of your walls, by following these steps.
Expert Tips for Mixing Render
What Mix to Use for Plastering Large Areas?
For large areas, use a weaker mix (example: 5:1) to prevent shrinkage and cracking. Work in parts, keep it moist and supple.
Sand and Cement Render Mix Best Practice?
Continue to use clean water and washed, sharp sand. To prevent clumping or caking, keep cement dry. Make only small quantities at a time to avoid early setting.